CONTACT
US

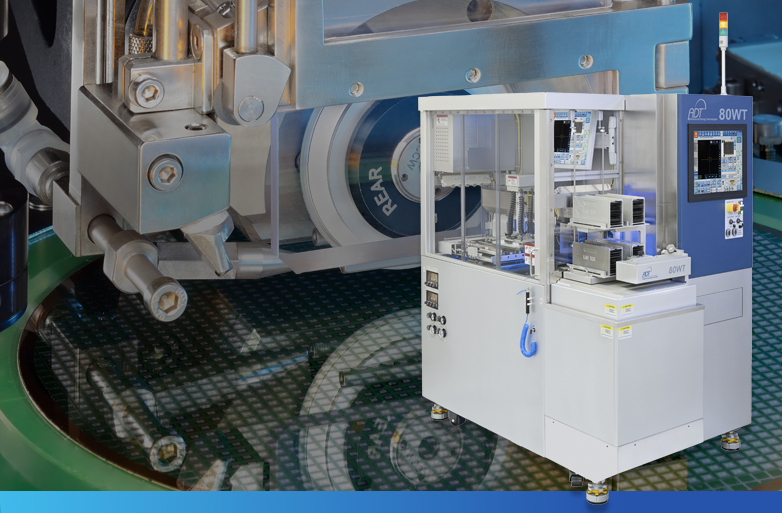
80WT - Fully automatic dicing saw


80WT - TECHNOLOGY

LASER MAPPING PROCESS

Precise mapping of the QFN substrate surface

  • High sampling rate
  • Sampling speed 50mm/sec
  • Repeatability 1μm
  • enclosure rating IP76

FIXED DEPTH GROOVE ACCORDING TO MAPPED SURFACE

  • Constant depth of cut groove
  • By Z and X interpolation
  • Final cut depth accuracy ±15µm

FEATURES & BENEFITS

Fully automatic two spindles dicing saw, designed for precise step-cut Wettable QFN dicing. The 80wt performs perfect grooving operation with constant depth of cut and groove shape, on an uneven surface of the substrate.

QFN MAGAZINE

Loading up to 4 QFN magazines, Each with up to 20 QFN substrates

TAPELESS PROCESS

TWIN SYSTEM

Double spindle

CLEANING UNIT WASH & DRY

Optional:

  • Brush + High Pressure Jet
  • Pressure Jet
  • Atomizing Jet

CHUCK TABLE

Automatic loading 2 QFN panels (can support single panel)

BRUSH DEBURRING

PRE ALIGNMENT

For the 2 substrates simultaneously

80WT - OPTIONAL ADD-ONS

  • Up to 76.2mm (3”) Blades OD
  • SECS GEM ready
  • Ionizer Bar – ESD discharge
  • Broken Blade Detection (BBD)
  • BARCODE item identification

RELATED DOCUMENTS

80WT - PROCESS SEQUENCE

STEP 1 Magazine scanning
STEP 2 Substrate loading and alignment
STEP 3 Laser mapping
STEP 4 Dicing
STEP 5 Brush Deburring
STEP 6 Cleaning

CYCLE TIME INFORMATION

PROCESS

Feed Rate: 50 mm/sec
Mapping Feed Rate: 50 mm/sec
Mapping Rate: 5 Cuts

CYCLE TIME - 2 LEAD-FRAMES

  • Laser mapping total time: ~ 2 min
  • Dicing total time: about 5.5 min including alignment
  • Brush total time: 30 sec
  • Total time: about 8 min

BRUSH

Brush Cycles: 1 Feed Rate
During Brush: 10 mm/sec

CLEANING CYCLE TIME

  • Rinse : 500 rpm | 30 sec
  • Atomizing: 800 rpm | 60 sec
  • Air Drying: 1200 rpm | 30 sec


Since cleaning is done during dicing the cleaning time does not effect the total processing time

TECHNICAL SPECIFICATIONS

Specifications80WT
Workpiece Sizeup to12" by 12" Square
Spindle1.8 KW Two facing spindles
LMS (Laser Mapping System)Accuracy±15 μm
Blade Size2" - 3"
Y1 / Y2 AxisDrive
Control
Resolution
Cumulative Accuracy
Indexing Accuracy
Cutting Range
Ball bearing lead screw
Linear encoder for each Y axis
0.1 µm
1.5 µm
1.0 µm
350 mm
X Axis
Air Slide
Drive
Feed rate
Cutting range
Ball bearing lead screw
Up to 1000 mm/sec
310 mm
Z1 / Z2 AxisDrive
Resolution
Repeatability
Max. stroke
Ball bearing lead screw
0.2 µm
1.0 µm
50 mm (for 2.188” blade OD)
Θ AxisDrive
Repeatability
Stroke
Closed-loop, Direct-drive
4 arc-sec
380°
Vision SystemUSB3 camera, High bright LED
Cleaning Station
Full rinse and dry cycle
Spinning speed
Cleaning method
100-3,000 rpm
Atomized cleaning capabilities
Wafer Handling systemSlot to slot integrity
Tapeless system
Standard FeaturesAutomatic alignment
Automatic Cut verify
Automatic Kerf inspection
Automatic Y offset correction
UtilitiesElectrical
Air
Spindle Coolant (per spindle)
Cutting water (per spindle)
200-240 VAC, 50/60 Hz, single phase
500 L/min @ 5.5 bar
1.1 L/min
Up to 3 L/min
Dimensions(W x D x H) mm
Weight
1145 × 1687 × 1830 mm
1,500kg
EnvironmentalRoom Temperature: 20°C to 25°C ± 1°C (77°F ± 1.8°F)
Humidity: Less than 70% relative humidity (non-condensing)
Cutting water / Spindle Water
Temperature ± 1°C (± 1.8°F)
Floor must be vibration free

80WT - OPTIONAL ADD-ONS

  • Up to 76.2mm (3”) Blades OD
  • SECS GEM ready
  • Ionizer Bar – ESD discharge
  • Inline Deburring Brush
  • BARCODE item identification
  • HMT – Height measurement tool
  • LMS – Laser mapping system